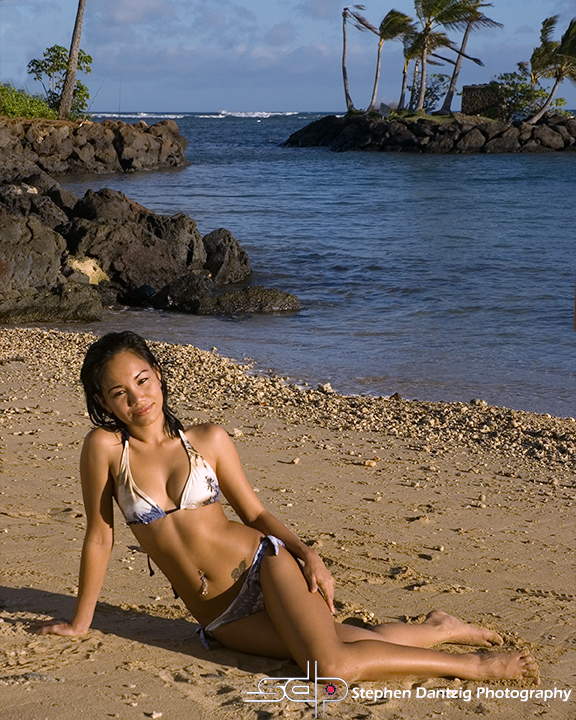
“Magic Hour:” Fashion/Swimwear Photography—Last week I posted some images of a surprise fashion shoot in Fiji.

Athena in Fiji from last week’s post
The lighting for most of the images was natural “Magic Hour” sunlight. It is called “Magic Hour” light because, when the sun is setting behind the photographer, then everything in front of the photographer (including your model) is lit by the same even lighting. The sun is lower in the sky so the shadows are not as harsh and much easier to use effectively. The sun is also not as bright, which makes it easier on your model’s eyes. Note that asking your model to look at you with the sun behind you is essentially asking her to look directly into the sun, which is still tough even at magic hour! Let her rest her eyes occasionally.

Remember that while the light is beautiful, it can still be tough on your model’s eyes. Just ask Naomye Leiza!
I mentioned last week that I used the Program mode for the shoot with Athena in the Philippines. While you can get away with that with that with this lighting, it is not something that I recommend. I use a hand held incident light meter whenever possible on my shoots. Incident light meters are spot on accurate, but normally you need to take the meter reading from where your model is with the meter pointed at the camera. This is not the case during magic hour. I can simply hold the meter over my head (with the dome aimed in the direction of the camera) and get my meter reading. Why is this so, and for that matter, why is the exposure the same at the camera position, your model’s position and the background? The hyper-annoying “depth of light” law answers this question. Light spreads out in all directions as it travels. The exposure values decrease as light spreads, but the exposure values stay more consistent the farther light travels. Sunlight has travelled a gazillion miles (ok, that’s an exaggeration!), so the spread of light is huge by the time it reaches the Earth. The exposure values will be consistent for miles!
Metering “Magic Hour” light is easy because the entire scene is lit evenly by the same light.
Now, this does not mean that there is nothing to worry about when shooting during magic hour. For one thing, the sun is setting, so the exposure values drop quickly and dramatically. The reality is that you only have about 30-45 minutes of this ideal light to work with and you might lose at least 2 to 3 stops of light during that time frame. Not only do you need to keep meter every few minutes, but you have to modify your camera settings accordingly, which will either increase the risk of motion blur (by choosing a slower shutter speed) and/or decrease your depth of field (by choosing a larger f-stop—smaller number).
Magic Hour light does come with its share of challenges. The exposure drops rapidly as does the color temperature of the light.
The other major issue has to do with the color temperature of the light as the sun sets. Magic hour is also known as the “Golden Hour” because your images usually have e a “golden”’ or amber hue. Every light source actually has a different color, even though our eyes interpret most light as white light. The white balance control on your digital camera tells your camera what color of light to look for. You get either an amber or a blue tint when the white balance is set incorrectly (don’t trust the auto white balance—your presets work much better!). The color temperature of sunlight is lower at sunrise and sunset than at midday. This results in an amber color cast when your camera is set for sunlight (high noon). But wait…don’t we want that amber hue? Yes, we do, but the color was can quickly become too much with transparency film (above) and in the digital world.

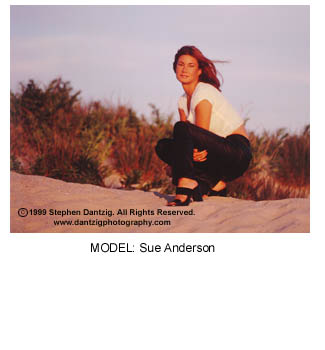
This image of Sue Anderson was created a long time ago with transparency film balanced for daylight. Transparency film…AND digital capture with the white balance set to Daylight or Flash, can turn the color shift too far to the amber side.
The tungsten or incandescent white balance preset will, um, “balance” the color temperature of the setting sun, but that defeats the whole purpose of getting that golden hue. Fortunately there is a compromise. Most of the higher end cameras allow you to dial in the color temperature (measured in the Kelvin scale). The daylight white balance press is around 5,500 degrees Kelvin and the tungsten setting is around 3,200 degrees Kelvin. I dialed in a color temperature of about 4,500 degrees Kelvin to neutralize some of the color cast while keeping some of the “golden look” for the following images of Thalia.
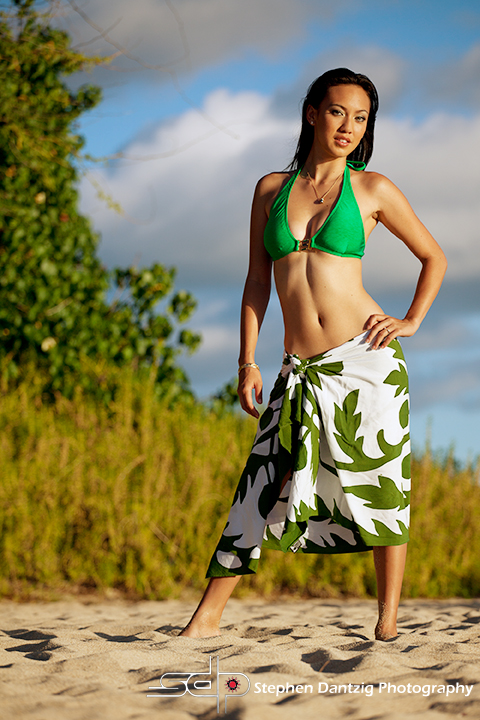
Higher end digital cameras allow you to “dial in” your own color temperature, so you can reach a nice compromise: amber “Golden” hues without too much orange!
The introductory level cameras do not have this option, but they do have a fluorescent setting which is pretty close.
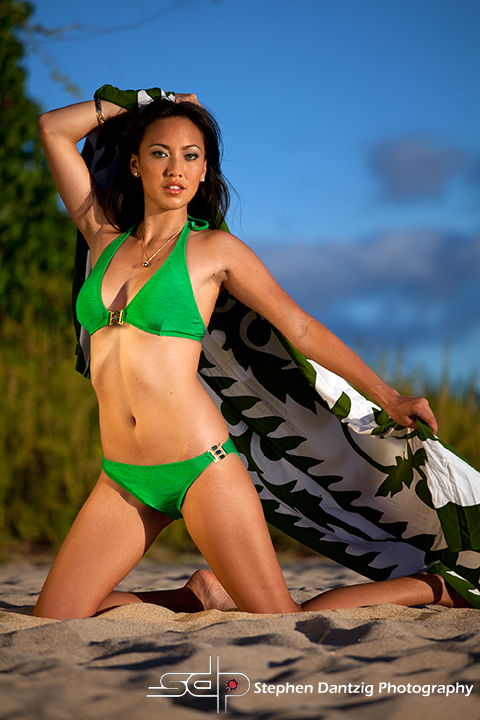
Lower end digital cameras have a Fluorescent White Balance setting which will get you in the ballpark. We used a reflector to bounce light into Thalia’s stomach and thighs.
Next week we get back to landscape photography and talk about ways to create beautiful images in less than perfect light. We will then tackle the same problem of handling bad light, but when photographing people. Stay tuned! Cameras: Canon 5DMII, Bronica SQ, Nikon D70; Various Exposures.